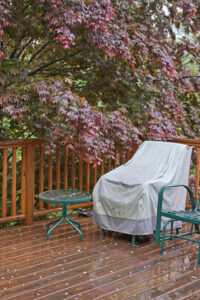
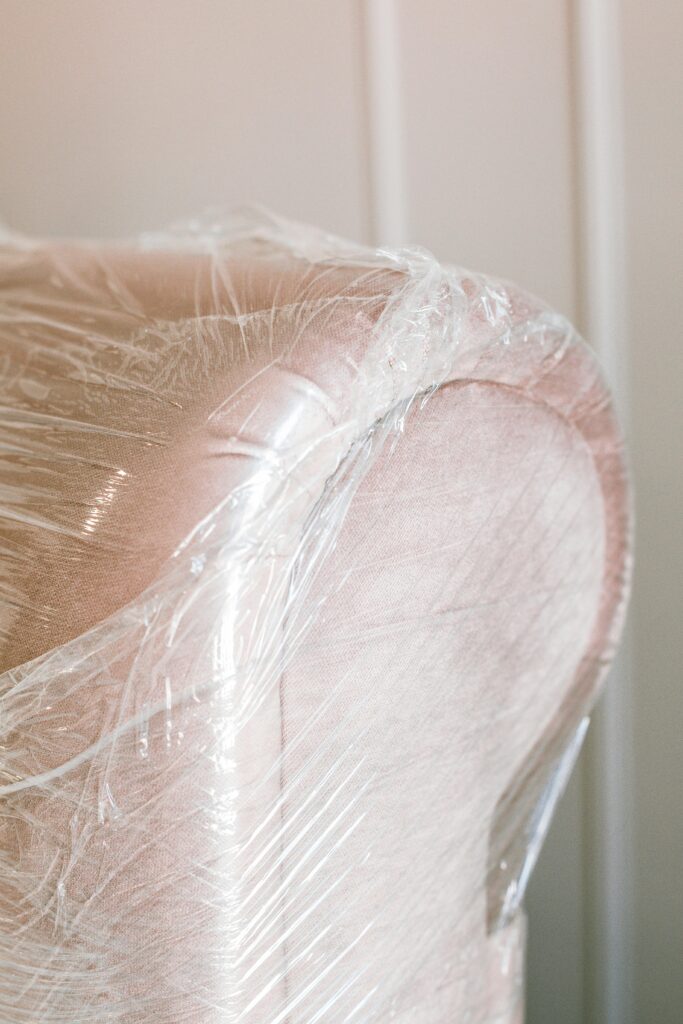
Shrink wrapping outdoor furniture is one of the most effective ways to protect patio sets, wicker chairs, and metal or wood furniture from harsh weather conditions.
By creating a tight, waterproof barrier, shrink wrap prevents moisture, dust, debris, and UV damage from compromising your furniture’s appearance and structural integrity. The cost of shrink wrapping varies widely depending on furniture size, material, method, and whether you hire professionals or do it yourself.
This guide breaks down costs, practical tips, and the best approaches for protecting outdoor furniture with shrink wrap.
How Much Does it Cost to Shrink Wrap Outdoor Furniture?
The cost of shrink wrapping outdoor furniture is influenced by multiple factors, including the size and type of furniture, the quality of the wrap, and whether labor is involved. Shrink wrapping can be done by homeowners themselves or through professional services, each option with distinct advantages and pricing.
Factors That Influence Cost
Several key factors determine the overall cost of shrink wrapping furniture:
- Furniture Size: Larger pieces, such as sectional sofas or dining sets, require more material and labor.
- Furniture Type: Wicker, wood, or delicate metal pieces may need extra preparation before wrapping.
- DIY vs Professional: Doing it yourself lowers cost but requires purchasing wrap and heat equipment; professionals charge labor fees but deliver tight, uniform coverage.
- Complexity: Oddly shaped or multi-piece sets take longer to wrap, increasing labor or time costs.
- Material Quality: Premium, UV-resistant commercial-grade wrap lasts longer but costs more than consumer-grade wrap.
Understanding these factors helps you decide the best approach for your furniture and budget.
Learn how to protect outdoor metal art from rusting?
Typical Price Ranges
The following table summarizes common costs for both DIY and professional shrink wrapping:
| Method | Typical Cost | Details |
|---|---|---|
| DIY Shrink Wrap | $15–$50 per small item, $50–$150 per large set | Includes wrap, tape, and heat gun; requires time and effort |
| Professional Shrink Wrap | $50–$150 per small item, $150–$500 per large set | Labor included; fast, secure, and neat application |
| Material Only | $10–$40 per roll of consumer-grade wrap | For DIY; covers multiple small pieces depending on roll size |
Large outdoor dining sets, sectional sofas, or irregularly shaped furniture may fall at the higher end of these ranges, while small chairs or side tables are more affordable to wrap.
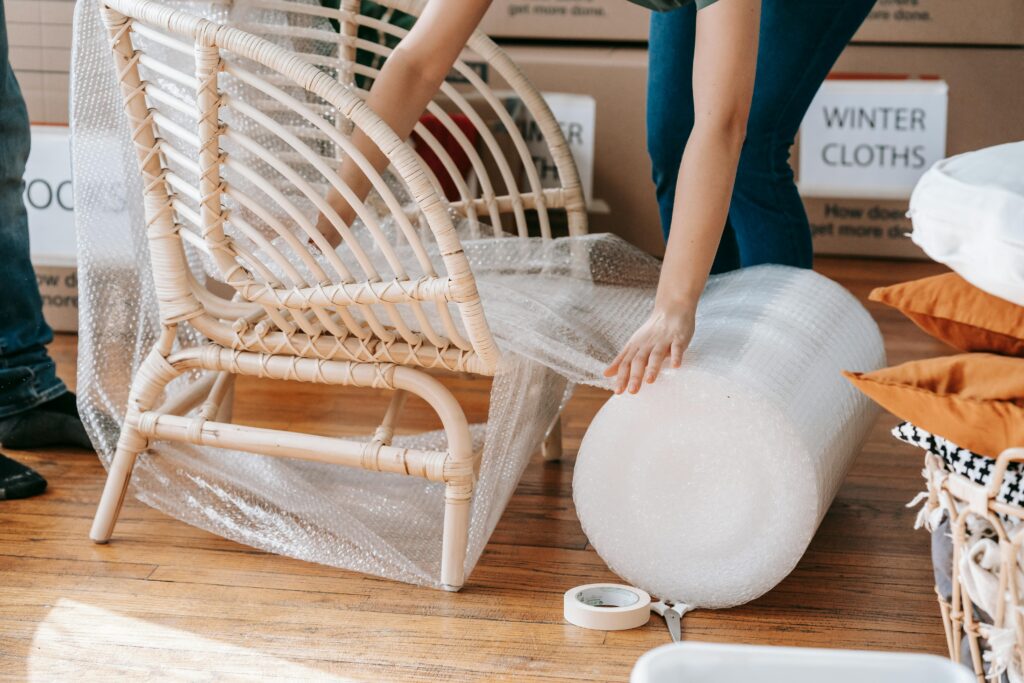
DIY Shrink Wrapping: Step-by-Step
DIY shrink wrapping is a budget-friendly option if you have smaller furniture and are comfortable with using a heat gun.
Step 1: Clean the Furniture
- Remove dirt, leaves, and moisture to avoid trapping water underneath.
- Wipe with a damp cloth and let furniture dry completely.
Step 2: Disassemble and Arrange
- Remove cushions and separate multi-piece sets.
- Place furniture on a flat, elevated surface for easier wrapping.
Step 3: Wrap with Shrink Film
- Start at the base and wrap upward, ensuring all sides and corners are covered.
- Use UV-resistant tape to secure edges and seams.
Step 4: Apply Heat
- Use a heat gun to tighten the wrap, avoiding overheating which can melt plastic.
- Smooth out wrinkles and ensure coverage is uniform.
Step 5: Check Seams and Corners
- Inspect for gaps or loose areas where water could seep in.
- Apply extra tape or an additional layer if needed.
Stay informed with the latest tips by checking out our knowledge base.
Professional Shrink Wrapping Services
Hiring professionals is ideal for large, valuable, or complex furniture sets.
- Professionals use commercial-grade wrap and specialized heat equipment.
- They provide a tight, uniform seal that is difficult to achieve with DIY methods.
- Labor and expertise reduce the risk of mistakes such as tears or trapped moisture.
- Some services include removal and disposal of the wrap after the season.
While the upfront cost is higher, professional shrink wrapping saves time and ensures long-term protection.
Cost-Saving Tips
Even if hiring professionals, there are ways to reduce expenses:
- Wrap multiple small pieces together if size allows.
- Buy wrap in bulk or larger rolls for multiple items.
- Schedule services in off-peak seasons for discounts.
- DIY small items and hire professionals only for larger, valuable furniture.
Balancing DIY and professional approaches can reduce costs without sacrificing protection.
Common Mistakes to Avoid
Shrink wrapping can fail if not done properly. Avoid these mistakes:
- Wrapping wet or dirty furniture, which traps moisture and encourages mold growth.
- Using low-quality wrap that tears or does not withstand UV rays.
- Applying uneven heat, leading to loose areas or melted surfaces.
- Leaving gaps at edges or corners, allowing water and debris to enter.
- Ignoring seasonal maintenance and reinspection.
Correct preparation and careful technique are essential to prevent damage and ensure effective protection.
Comparing DIY and Professional Options
| Aspect | DIY Shrink Wrap | Professional Shrink Wrap |
|---|---|---|
| Cost | Lower upfront, mainly materials | Higher, includes labor |
| Time | Time-intensive, depends on experience | Fast and efficient |
| Skill Required | Moderate; learning curve with heat gun | Minimal; handled by experts |
| Quality of Seal | Adequate if done carefully | Highly uniform and secure |
| Risk of Damage | Higher if done incorrectly | Low; professionals handle furniture properly |
This comparison helps homeowners decide which approach best fits their budget, skill level, and furniture value.
Additional Tips for Protecting Furniture
Shrink wrapping is effective, but combining it with other protective measures enhances longevity.
- Store furniture on raised surfaces to avoid direct contact with wet ground.
- Remove cushions and store them indoors.
- Use breathable covers in combination with shrink wrap for extra protection.
- Inspect wrapped furniture periodically during winter or off-season.
Taking these precautions ensures furniture remains safe from moisture, UV rays, and physical damage.
Frequently Asked Questions
This section addresses common queries about shrink wrapping outdoor furniture.
How long does shrink wrap protect furniture?
Shrink wrap protects furniture throughout the winter or off-season, typically 4–6 months depending on weather exposure.
Can I shrink wrap all types of outdoor furniture?
Most furniture types, including wicker, metal, wood, and plastic, can be shrink wrapped, but delicate or antique pieces require careful handling.
Is professional shrink wrapping worth the cost?
Yes, for large, high-value, or oddly shaped furniture, professional services ensure a secure, uniform seal and save time.
Can DIY shrink wrapping damage my furniture?
Improper heat application or overly tight wrap can damage furniture. Following manufacturer instructions and using proper equipment prevents this.
How do I remove shrink wrap safely?
Cut along seams with a utility knife or scissors carefully, avoiding sharp tools that could scratch or damage the furniture surface.
Conclusion
The cost of shrink wrapping outdoor furniture varies widely based on size, material, and method. DIY wrapping can save money but requires time and skill, while professional services provide a secure, uniform seal at a higher cost. Proper preparation, technique, and seasonal maintenance are key to protecting your investment.